Showing posts with label garment sewing. Show all posts

Monday, May 6, 2013

Progress

Couture dress front
Well, I certainly didn't *mean* to take a 6-month break from the blog, but...! Life, you know? I'm just popping in today to share a bit of progress, because even though things aren't being blogged here or posted to my Flickr page (both things I really want to improve upon), they are happening.

Couture dress midriff front
For instance: this dress. This is my in-progress couture dress from the Susan Khalje Couture Dress class on Craftsy.com. I have been working on this pretty much exclusively for two months already! I had hoped to finish a month ago, in time for my birthday, as is my tradition, but alas... (I tabled the dress for a day and whipped up another, so no fretting! I did have my birthday dress!) I knew this dress would be time-consuming, but underestimated exactly how much time!

Couture dress front bodice side detail
Still... It is phenomenal. I am loving it. The dress is made from an Amy Butler voile print, underlined in silk organza. I got a deal on the silk because it was "printed" to look like a linen texture. The printing side is a little sticky to iron, but the other? Fab. And it's silk! And it was half price. Score.

Couture dress back
In these photos you can see the silk organza underlining and the many many many catch-stitches I did, in various thread colors, to hold the seam allowances open by tacking them to the underlining. In some places on the underlining you can see the grainline marks that I transferred while tracing, or even my marker labels of "front" and "back" on the circle skirt pieces, which are slightly different. You can also see the back of my hand-picked zipper. It was my first time doing ALL of these techniques, much less in one garment!

Couture dress hem
And oh, this hem! This hem. I have spent probably 12 hours on this hem! Fully encased in there is a 2" wide strip of horsehair braid! I didn't leave enough hem allowance to enclose the braid when I cut the skirt pieces, so I created a hem facing out of a wide bias strip of lining fabric. The horsehair braid was catch-stitched to the turn of the hem, and then shaped into a curve and catch-stitched at the top of the braid as well. The bias strip was then pressed up and fell-stitched to completely cover the horsehair braid--both to hide all those loose catch-stitch threads and to keep the braid safe from washing and wearing. And look at those lovely cones and graceful folds of fabric! I'm very pleased with these results.

Couture dress hem detail
So, what's left? I've basted the skirt lining in place and am working on fell-stitching the bodice lining around ALL the outer edges, and then understitching it to the seam allowance as well. Then goes in the midriff band, and then the lining hem! And then all the finishing touches. Heh. So, I still have a ways to go, but nothing near all the work I've already put in, what with tracing and fitting and hand-basting the entire thing together... Still, it's the best fit I think I've ever gotten on a garment, as you will see! The work is all totally worth it, and I'm really enjoying the process. Still, I need to wrap this up, because I've got some plush drafting to do! I hope to debut at least one new animal at this upcoming show I've been accepted to! (!!!!!!!)

And if you're interested in more frequent updates from me, I hang out on Twitter a lot, and have been posting on Instagram and my Facebook page a bit as well.

Thursday, August 16, 2012

Introducing...The Betty Skirt!

Betty skirt - border print 2
Remember this skirt? Well, here it is in full. It is a super simple construction: two lengths of fabric, sewn selvage-t0-selvage, and then gathered the heck out of to fit a waistband. Super easy. So easy I felt confident enough to tackle it with a border print (gasp!). So easy...I made a whole bunch more!

Betty skirt - Innocent Crush voile 3
Here's my second version, out of Anna Maria Horner Innocent Crush voile. I'd had this in my stash for a long time and just didn't know what to do with it. Proof positive that sometimes holding onto something until the right project comes along is important. I wear this skirt all the time now!

Betty skirt - Innocent Crush voile 2
This one has a few improvements over the first. Namely: pockets. Not as awesome of an addition but even more necessary: underskirt. (This one is made from a dark gray Bemberg rayon.) Because these skirts are made from cotton lawn or voile and are floaty. All it takes is one little breeze to pick up any bit of that 100"+ hem circumference and woosh! the skirt is around your shoulders. Yep, the built-in underskirt is a necessity, which means my border print is relegated to having a slip and / or heavy tights underneath.

Betty skirt - leaf lawn 4
And my third and, arguably, best version: the leaf skirt. This one is made from fabric I picked up at Mood last April. That was actually when I got the idea to make this skirt; it just took me a year to put it into practice!

Betty skirt - leaf lawn 2
Check out that fabulous pattern-matching for the inside of the pocket! Too bad I ran out of fabric and couldn't match as well on the other side...

So, why is this named the "Betty" skirt? Two reasons: 1) The fullness of the skirt totally reminds me of something season 1 Betty Draper would've worn, and 2) Wearing a super full and floaty skirt makes a girl feel like a total Betty.

Amber in Betty skirt
This skirt was so easy to make that I felt confident enough to make one long-distance for my friend Amber in DC! Look how cute she is in it! I love how she styled it with that striped top, too (the two of us are a little obsessed with print-mixing). I was able to use her measurements and make her two skirts that fit perfectly with no alterations! That made me awfully excited.

I want to remind you about my newsletter (which you can sign up for here!) and my Facebook page (here!). New softies revealed and online this weekend; I promise!

Thursday, August 9, 2012

Catching Up: Tops

Lavender blouse 4
What's a girl to do with an overwhelming pile of photos to be edited (from, seriously, months ago) and then blogged? Just plunge in, I suppose.

Lavender blouse 5
So, this is me, plunging. Remember in the spring when I was making tops? Like this one? I decided I was on a roll and would finally make up some that were in my stash / on my to do list for years. This is one of them.

Lavender blouse 3
I bought this fabric probably 5 years ago. It's some kind of polyester crepe thing that I would never buy now. It frays like mad, too. But at the time, I was wearing a RTW peachy-champagne-colored top in a similar silhouette that I just loved, so decided to make my own version of it. Out of this lavender satiny stuff.

Lavender blouse 2
The pattern is New Look 6705 and, from what I can remember, worked up quickly and easily. I French-seamed the entire thing, and omitted interfacing in the yoke. This top is really similar to the RTW one I loved (and still wear a few times every winter), except the fabric is thicker and doesn't drape as well. I always worry about wearing things that are so flowy / blouse-y--do they read maternity? I paired this with a tight skirt, but I don't know if that makes a difference. Thoughts on this? I may revisit the pattern for some of the other options; doesn't the little puff-sleeve version look adorable?

Roundabout Blouse 2
I was on a roll, and French-seaming ALL the things, so I finally made up this Roundabout blouse from the pattern by Anna Maria Horner. There is a sad, sorry lack of these on the interwebs; what gives, crafters? Nobody else likes this pattern? I got the pattern to make the dress, originally... and then I realized that drop-waist dresses look godawful on me, so I scrapped that plan for the blouse instead. A blouse that I can't wear with a skirt, because it makes me look like I'm wearing a sack. This is definitely a with-pants pattern.

Roundabout Blouse back
The fabric I used (Valori Wells Nest voile--super old, I know!) is sheer. And directional. So I ended up making the Roundabout slip, in the cami version, to go underneath. And for that, I used more of the cotton-silk poplin I had leftover from CK's wedding dress last year. It's nearly gone! But oh man, is it luxurious. I French-seamed the cami (ALL the things!) and made the straps a little long, so it wouldn't peek out the neckline of the blouse. I gotta say, that bias-cut cami is a sexy little number. If you haven't made one for yourself, you really should. The silk is just an added bonus.

Roundabout Blouse 1
I think this project is successful, though if I remade it, I would shorten the sleeves to just above the elbows, tighten the cuffs a smidge, and leave the neckline pleats closest to the shoulders on the front undone. It's a leeeettle bit snug up top *ahem*, but with no other shaping, nothing worth performing an FBA on.

And there you have it: two tops I made in March, photographed in April, uploaded in July, and blogged in August. There is more where that came from, so keep your eyes peeled!

I also want to shamelessly plug my newsletter (which you can sign up for here!) and my Facebook page (here!). I'm editing photos for my newest batch of softies, to be listed in my shop soon, but if you join the newsletter, you'll get the first peek! They're awfully cute, if I do say so myself!

Friday, July 13, 2012

Fashion-forward, or fashion fail?

Oh hai. Remember me? I used to craft stuff and blog about it here. I'm still crafting stuff, but I've realized that I am really really awful about downloading the photos from my camera to the computer, and then doing the necessary photo editing, and then uploading, and then posting. Ugh.

So, while I work on getting my act together (because, really, I have so much to show you!), here is something for you to contemplate: Is the outfit above fashion-forward, or a fashion fail? It's something I pulled together on Tuesday, channeling Mondo and trying to bravely match some prints. I wore it all day, but even though Rob and my friend Amber applauded my fearlessness, I'm not sure. Apologies for the crappy cell phone pic--the tee is this amazingness from Maryink, and the skirt is this. What do you think? Fearless, or stupid?

Friday, June 1, 2012

Licorice Dress, part 1

Licorice dress 1
Well, as usual, I'm a day late and a dollar short, as my mom would say. I finished this dress on Memorial Day, but then didn't have a chance to photograph it for a few days, so I missed the chance to be in the Licorice parade. Ah well.

Licorice Dress 4
Anyway, this is the final pattern from the Colette Sewing Handbook and the last bit of the Sew Colette sew-along. Sniff. When I first saw the book's patterns, I was really excited about this one. But as the time to make it drew near, I became ambivalent. That is, until I made the muslin. Because, holy crap!, this style looks really cute on me!

Licorice Dress 3
The dress took me a while because it's fully lined and I followed all of the instructions. I must've spent two hours on the collar alone, with all the trimming and grading and clipping of curves.... By the time I got to the sleeves I just wanted to be DONE, so I went with pre-made bias tape I had on hand. I'm not ashamed.

Licorice Dress 2
When I made the muslin, I tried it on with the Peony belt I had made and really liked the look, so I made another to wear with this dress. I really like the kind of pop the electric blue gives it; what do you think? Too much?

Licorice Dress sans belt
I pretty much just made my usual modifications to the pattern. The double-pointed darts are tricky, so I didn't want to mess around with them. I removed 1" from the bodice because I'm a shorty, did a sway-back adjustment, and extended the back darts both up and down for a smoother shape. I read over the finished garment measurements and decided there was enough ease built into the pattern that I could forego my usual FBA. Yessssssssss!

Licorice Dress hems
So, I like this dress. The sleeves are going to save me at a family function in a few weeks (cough, cough), so I'm happy about that. I think I could've gone a little more snug on the elastic, but I'd rather have the cuffs be too loose than too tight. Like Rochelle, I found this pattern to be a bit short. Instead of doing a normal hem, I used more of the pre-made bias bind, so I only took 1/4" off the length.

And that's that! I have another version of this dress coming up, and a reveal of what I did with the silk! So stay tuned...

Sunday, April 29, 2012

A Taffy, and a Question

Untitled
At the last minute, I finished my Taffy for the Sew Colette challenge! Actually, I must confess: I think of this as a wearable muslin, as I never made one (a first in a long while).

Taffy blouse 2
I did read others' feedback on the pattern, so I made adjustments to the paper pattern before cutting out my fabric. I added an inch to the neckline at the shoulders, tapering to the pattern as written in the centers. I also did my usual removal of 1" at the waist because I'm a shorty.

Taffy blouse 4
All of the fabric for this blouse was left over from the Chantilly dress I made for my brother's wedding. I made my own bias tape, and I'm happy to report that cotton lawn makes a really nice one! It's thin but holds a crease well and hardly adds any bulk to the finish, even though all edges of the bias-bound garment are five layers thick!

Taffy blouse 6
Still, the top didn't fit me very well. The front was fine with only the shoulder width adjustment, but the back? Super baggy. More than just me not doing a swayback adjustment (which would've been a good idea, but I forgot, mostly). I ended up pinning out up to 3" in the center, tapering to nothing at the ends. I like the tailored look here--it kind of reminds me of my Jasmine top, with the center seaming.

Taffy blouse silk
So now, the question. As mentioned, this is my wearable muslin. In fact, way back in January, I bought this sweet blue printed silk charmeuse to use for this blouse specifically - I think I have 2 yards. Instead of making a regular muslin and using the silk, I'm waiting on some fabric stabilizer, which is in the mail but hasn't arrived. This may be a good thing, as I'm not sure this top is for me.

Taffy blouse 5
What do you think, dear reader? Should I make the swayback adjustment to my pattern piece, possibly add a center back seam, and make this top again using the silk? Or should I call it even and use the silk for something else--another Jasmine, perhaps? What say you? I'm leaning toward saving the silk, but could be convinced otherwise...

Wednesday, April 25, 2012

An award, and a skirt

I saw a sweet blog comment this morning from Johanna saying that she'd found me via Rachel at Darling Autodidact, who had given me an award! It seems Rachel has nominated me for a Liebster. Rachel mentions in her post that she had been nominated twice before actually posting about it, and I must say that I've done the same! I was first mentioned by Ronit of Two Hippos a month ago and did nothing about it (shameful!). SO. Here is my appreciation! Thank you to all those fabulous ladies!

According to Ronit, "The award--whose origins are unknown, as best I can tell--is for small blogs and helps spread the word about them." The whole thing feels a little chain-letter-y to me, but I'm happy to present to you five blogs, below, with fewer than 200 subscribers, according to my reader. This should not be so! 
  • A Table in the Shade: Written by Molly, my former assistant who moved away (*sniff* she's legendary, I tell ya) and then found sewing. Her site is gorgeous and her work is impeccable!
  • Summer at Grandma's House: Kris is a really great quilter who uses a ton of color to make really fun stuff!
  • Ice Pink Stars: I just found this blog, run by Allie, who is super cute! She has a great style, some crafty tattoos, and makes some fabulous garments!
  • The Cataloguer: Another new-to-me blog, by Liz, who also makes some fabulous garments!
  • Gather Here: A local (to me) stitch lounge full of crafty people and tons of inspiration!
So there you have it. If you don't know these blogs, please check them out! And, because this post wouldn't be complete without a picture: 
Here's a skirt I whipped up on Sunday. I was in a mood to clear out a bunch of my stash fabric, most of which has already been pre-washed and earmarked for garments that I just never get around to sewing. I Tweeted that I wanted to wipe out a bunch of it with some garments; this is the only thing I actually accomplished. Still, it's AWESOME. I'm calling it my Betty skirt; full photo shoot (plus 2 more versions!) to come...

Wednesday, April 18, 2012

Featured!

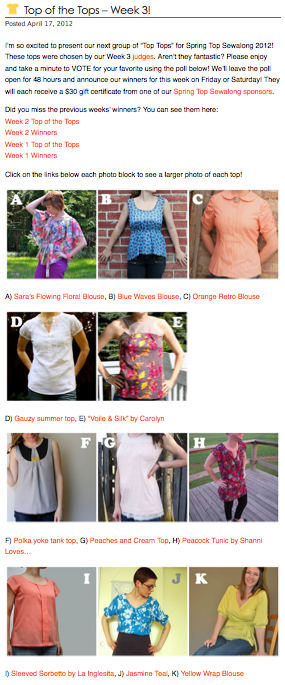
Aww, sweet! My aqua Jasmine top (which I'm wearing today!) has been featured in this week's Top of the Tops for Made by Rae's Spring Top Sewalong! I'm so jazzed because there are SO many great and inspiring tops in the sewalong pool on Flickr (305 at this very moment!) so I am floored to be included, especially in this week's group! Hop on over to Rae's blog to vote for your favorite here!

I finished another top last weekend and hope to get it posted soon. I've been a little busy, though, sending out my first ever order from my shop on Etsy! Thanks, Rita!

Sunday, April 15, 2012

Jasmine top in teal

Jasmine teal 1
I finally have a top finished that I can enter in the Made by Rae Spring Top Sewalong! This is the Colette Patterns Jasmine blouse, version 1 but with the shorter ties from version 2, sewn up in a loosely woven cotton lawn. It photographs a lot more blue, but is actually a teal color with bright white flowers.

Jasmine teal 2
Here I am wearing it with my Meringue skirt, which gets a lot more wear than I initially thought it would! The blouse is completely cut on the bias, which gives it this lovely silhouette and also means no closures! Yay!

Jasmine teal 4
Bias also means that the seams were a pain in the butt to sew with a loose weave. I think my fabric choice for this top made everything a lot more difficult than it needed to be. I ended up with a weird ripple / bump in the top of the center back seam that took me three tries to fix. Also: even after letting this top "settle" on the hanger for nearly a week before hemming it, the hem is still a mess.

Jasmine teal 5
So, tucked in it is! The only change I made to the pattern this time around was to shorten the length at the shorten line by 1". (You really can't just take length off the bottom of this pattern because it is shape-skimming.) No FBA necessary. Yay! I also used a skinny ribbon for the collar loop because making one from the pattern piece I'd cut seemed impossibly small. I think for my next try I will increase the circumference of the cuffs by a tiny bit, as they're a little snug going over my elbows.

Tuesday, April 3, 2012

Better late than never!

Truffle dress 5 
I am a few days late with this finish of the Colette Sewing Handbook Truffle Dress for the Sew Colette sew-along, but let me tell you: it was worth it.

Truffle dress back 1
Before I even stitched up my muslin for this dress, I made all of the adjustments I had made to my Pastille Dress, except for a few random adjustments to the back bodice, to the pattern pieces. Then I stitched up my muslin and--miracle of miracles! It nearly fit! In fact, the front fit perfectly (!!) and the back fit perfectly, too, until about 5" up from the waistline. I am coming to terms with the fact that my back is narrower and shorter than Colette Patterns are meant for, so I went two more rounds to perfect the back so that it was nicely tailored. That is the piece that threw me off schedule to meet the sew-along deadline. (And the hem really is straight; I am just standing with my hips canted in this photo!)

Truffle dress 4
Here's a side shot, where you can see the drape a little better. Because of the print, it kind of disappears into the fabric, but there's movement when I walk, which is very sweet. The fabric I used is a gorgeously soft and drapey rayon poplin. I scored mine at a fabric store in Portland, Maine last summer, but some is still available here (on clearance!) It was my first time working with something like this, and I think I did pretty okay. I cut the fabric with paper underneath, to reduce the slipperiness, and I made sure everything was on grain before cutting.

Truffle dress 1
The bodice is lined with an electric blue quilting-weight cotton, which really did the trick! It's structured and the bodice looks extra smooth, where it would sag slightly if unlined. Because the rayon is so drapey, though, it kept sliding off the table, ironing board, sewing desk... The neckline gapes a little, probably because it could've benefited from some stay-stitching right off the bat.

Truffle dress 3
I love everything about this dress: the shape, the feel, even the skirt drape, which I wasn't crazy about but decided to include because I think Sarai knows what she's doing! I would like to make another in a crisper fabric, more like the example in the book. And then I'd like to make one without the drape, maybe with a fuller skirt (with pleats at the waist?), or maybe another using the skirt pattern from the Pastille dress instead... I dare say, it may be the summer of the Truffle for me!

Tuesday, February 28, 2012

Pastille dress: DONE

Pastille 1
Finally. This dress... I will say up front that this was probably the most difficult dress I've ever made. This one dress represents 13 hours of fitting (three muslins, oy) and 9 hours of construction. And I still have to tack the facings to the seam allowances.

Pastille 2
Apologies for the dark photos--I'm still trying to figure out my camera's white balance (and I thought I had it!) These were taken late last night, and I am heading out of town super early tomorrow, so wanted to get this posted before I take off!

Pastille 5
So, the dress. I was afraid of this dress since I got the book, and for good reason. Here's a brief rundown of the adjustments I made:
  • FBA of 1.5"
  • short-waisted adjustment of 1"
  • removed over 1" of width from the back bodice
  • removed an additional 3/4" from the back bodice length, regraded front to match
  • sway-back adjustment of 1"
  • lengthened back darts by 2"
  • used invisible zipper instead of centered one
YEAH. And, looking at these pictures, I realize I probably should've gone at least another round to reduce some width from the bottom of the front bodice, which is looking a little baggy, but...

Pastille 7
I used a gorgeous linen/rayon blend for this dress. Pros: the color is a lovely deep periwinkle that is definitely MY kind of color, plus I think is flattering on me (plus it goes with all of my jewelry). Once I pre-washed the fabric, it got really soft and comfy. Cons: the fabric is incredibly shifty, which made it difficult to cut. REALLY difficult to cut. I pre-washed and hung it to dry and it got that soft, rumply look--which will not iron out. And yet, the dress holds its shape fairly well and it incredibly comfortable to wear. For a first try, it's definitely a keeper.

Pastille 4
I didn't have time to make the neckline bow, and now I'm wondering if I should or leave the dress without. I do feel it needs a little something there... I'll be interested to see what everyone else does!

Pastille back
In all, I feel like the back is more successful than the front. I'm also wondering about making this as just a skirt. It would probably work well enough. I think the length on me is just perfect, too. Still, I'm ready to be done with this dress and move along, even though I know I'll have these bodice issues for the next dress as well. I'm heading to Chicago for the next five days (AWP! Anyone else going??) so it'll be nice to take a little break from my sewing room and spend some time with my Dear Jane instead.

Thursday, February 23, 2012

Portfolio dress in velveteen

Portfolio velveteen 1
I will confess: I've been a bad sew-along participant. I am having massive problems fitting my Pastille dress. I started it late because I was working on this dress, which maybe wasn't the best idea, but it feels good now to have a completed dress that worked out while I'm struggling with my third (!) muslin for the Pastille. (Just....ugh.)

Portfolio velveteen 4
So. This is the Lisette Portfolio dress, sewn up in a luscious Loulouthi velveteen that was gifted to me for Christmas by a friend. Though I bought some Innocent Crush velveteen in October, this was my first time actually sewing with it. It wasn't as difficult as I thought it might be. I followed Anna Maria Horner's tips here, which I highly recommend. I finished all seams with an overcast stitch to minimize raveling over time; I'll let you know how that works out.

Portfolio velveteen back 2
The pattern came together easily. I opted not to use a contrasting fabric and instead fussy-cut the yoke and other details. I used a lightweight cotton lawn for the pocket lining and the facings, so as not to add bulk. I chopped 2" off the bottom, because I'm a shorty. I usually remove length at the waist, but because of how this one goes together, I didn't want to mess with redrawing those curves. My pockets are a little low, but I can live with that.

Portfolio velveteen 2
This is the first time I've really done any pattern matching to speak of, and I think it turned out really well. I knew that if I didn't take the time to match the flowers up all the way around, it would've bothered me every time I wore it. I've already worn this twice, and it's comfy and warm--the perfect winter dress.