Our big Christmas present to ourselves (with some $$ help from my folks) was
a new couch. Actually, mostly just "
a couch," because prior to that we had my pre-college futon. Only. Which was (and is) falling apart. We've done some redecorating and moved the futon into my craft space, where it *just* fits, and have really been reworking the living room. It now feels less college-y and more grown-up, which is great, since we're thirty-ish and it's been a loooong time since undergrad! (I should note here that part of what took so long to get the couch was the fact that we live in an old New England home with skinny, windy stairwells. Getting a couch from Ikea, in pieces, was necessary; even then, it took some doing to get it into our third-floor apartment!)
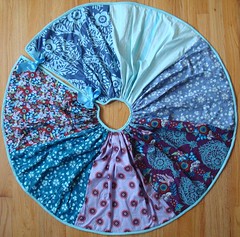
Anyway, part of the living room remix project involved a Christmas tree upgrade. This was our 8th (!!) married Christmas together, and for the first 7 we had a little 12" fake tree from Target that we would load all of our ornaments on. We couldn't leave it on the floor, so put it up on a TV tray, but then Iris would knock it over, so when we were at Kohl's around Thanksgiving and they had 4' pre-lit trees on sale, we jumped on it. I made this tree skirt for the new tree to help dress it up a bit, and I love it!
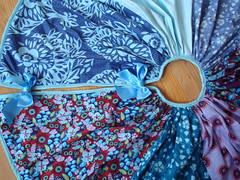
All fabrics are from Anna Maria Horner's Innocent Crush line--the quilting cottons. The skirt is based on the one I saw
here, but was even easier to make! For whatever reason, the first time I saw the tutorial I thought the skirt was gathered in the middle, not that the wedges were cut out. So when I made mine, I did a little math (radius! pi!) to figure out how big, but I think I ended up cutting 18" squares (I started with fat quarters, so that was easiest), sewing them along one side, and then gathering the top. The trickiest part was basting the skirt! For backing and binding I ended up using a flat sheet I'd already cut up for pattern drafting; it just happened to match perfectly! I made the binding out of the sheet as well, and that was the biggest pain in the ass but the final look is worth it. The double-faced satin ribbons came from my stash and I love that touch; it makes the whole thing feel so luxurious. I still haven't quilted the segments to the backing, and now the whole thing is put away, but I think next year I'd like to do some hand-stitching, just on the side seams, to help hold it all together.
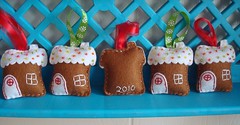
This year I also started what I hope will be a new tradition for me: ornament making. When I was a kid, every year my mom would get us a different ornament and write the year on the bottom/back. I re-joined
Crafter's Choice a few back (what can I say? they made me an offer I couldn't refuse...) and one of the books I got was
Fa La La La Felt, which is really really fantastic! After some hemming and hawing, I decided to make the gingerbread house ornaments for a few select family/friends, plus one for our tree, of course!
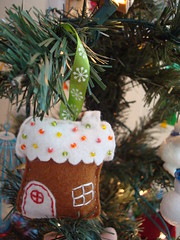
I followed the instructions mostly as written, but added seed bead "sprinkles" instead of
little felt circles. I also didn't stitch the white "roof" down in the scallops--I figured all the bead stitching would hold it in place. I added the year to the back and some cute ribbon to hang, and that was that!
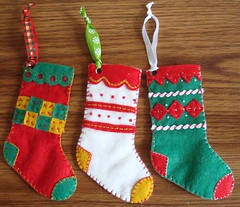
I also made these mini stockings from the book as part of my gift to my brother and future sister-in-law. They just bought a big house, which will need a BIG tree with lots of ornaments! I thought it would be nice to give them some to start out with, and add a few each year. These were easy to make but took a LONG time because of all the different embroidery stitches. Still, it was good practice; I think it took me as long or longer to decide how to stitch them than to actually do the stitching!


2 comments:
I'd love a pinterest invite! Kimberjeb@gmail.com.
Also, your Christmas tree skirt is awesome. I'm VERY impressed!
Your ornaments are adorable! I love the beads instead of the felt circles. I made some and used a hole punch to make cutting the circles easier, but the beads are a nice touch!
Post a Comment