Thursday, December 31, 2009

Gifted: Diaper bag, etc.

Hallie gifts 2

One of my very best friends from college is very pregnant right now, due in February (with a boy!), so for Christmas I decided to go all out and shower her with handmade goodness. I had given her a list of suggestions of handmade baby things that I could make, including mobiles, bibs, totes, stuffed animals, and a diaper bag. Of course, she chose the diaper bag. I showed her some photos of patterns in books that I had and she really liked the Amy Butler one from Little Stitches for Little Ones. Of course. The most ginormous diaper bag in existence! The one with 23 steps explained over five pages... of course!

diaper bag 3

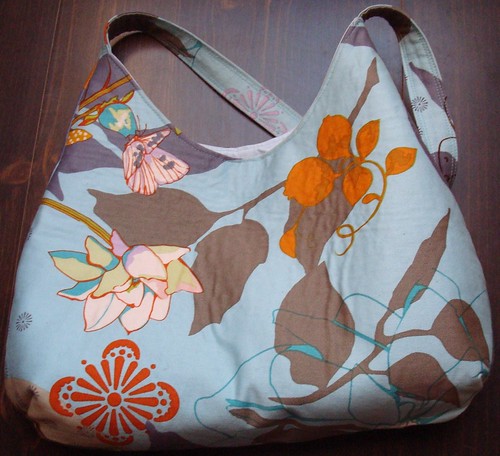
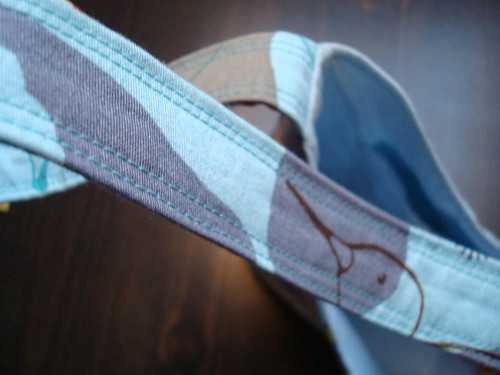
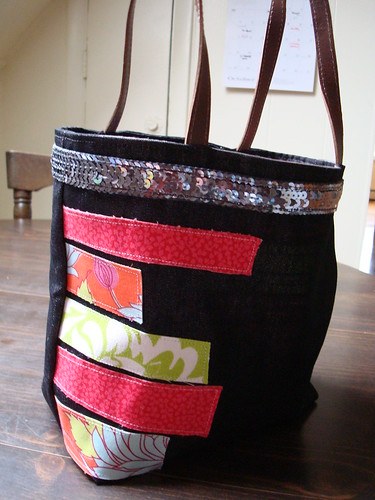
Per usual, I made some modifications to the pattern. For one, this bag is HUGE, and my friend is tiny (when not pregnant). So I scaled it down just a bit, removing a total of 2" from the width of the bottom and the front and back panels. I also re-graded the outer front and back panels so they wouldn't angle out so far. And, because I'm afraid of magnetic snaps and the damage they can do, I adapted the outer panel to use a giant vintage button instead.

diaper bag 6

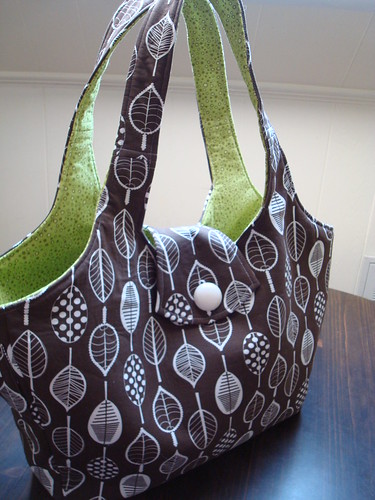
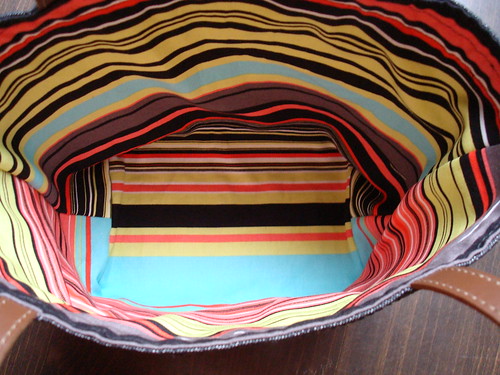
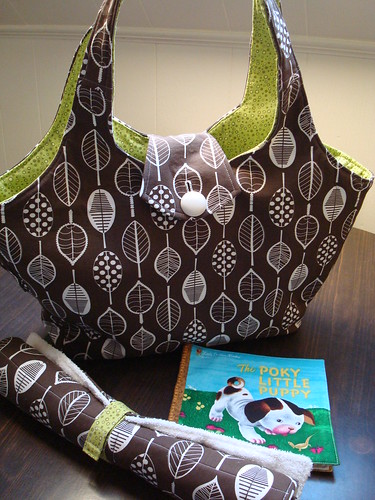
Though there was much swearing, and begging, and at least a few desperate shouts of, "Amy Butler is trying to kill my Brother!!", I survived. And so did the bag. And you know what? Though I probably wouldn't make another one for less than $400 (and that's if I'm feeling generous), I kinda love it. I love how very Hallie it is, with that awesome bamboo-blend cotton on the outside. I love how cool and stylish it is. I love how the bottle pockets turned out inside, and the adorable little cell pocket on the outside. And I love the giant vintage button, which I just want to put in my mouth. No, seriously, I want to bite it. But I can't, because now it's in Minnesota with a very adorable and hugely pregnant amazing friend of mine. And you know what else? That is truly awesome.

changing mat 2

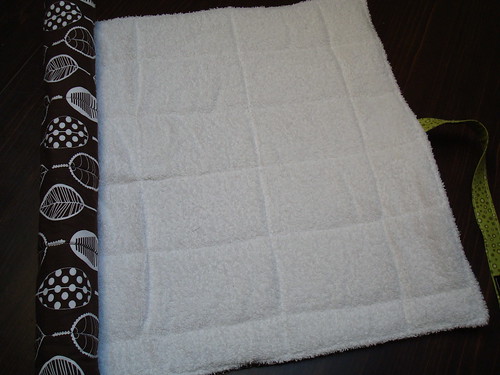
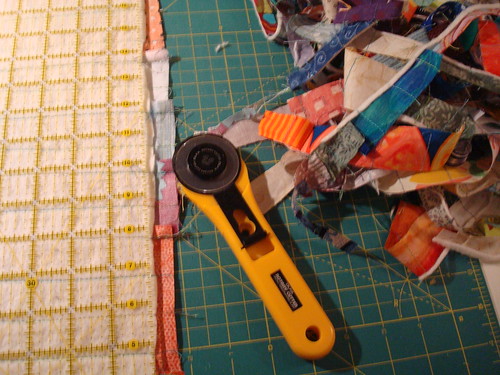
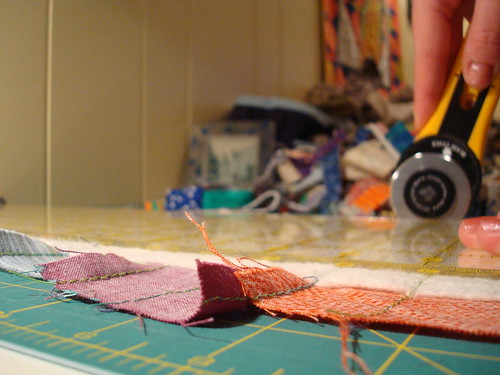
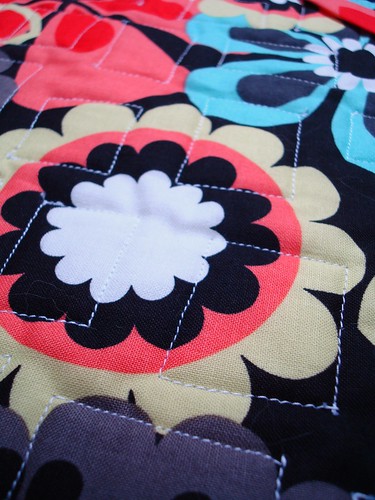
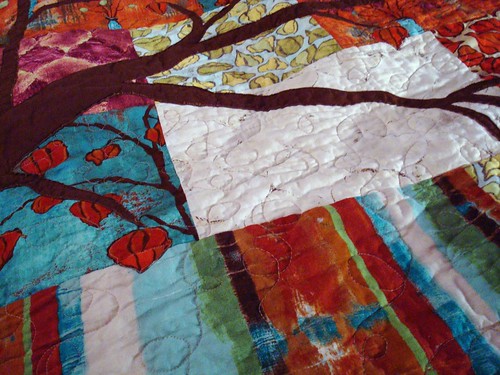
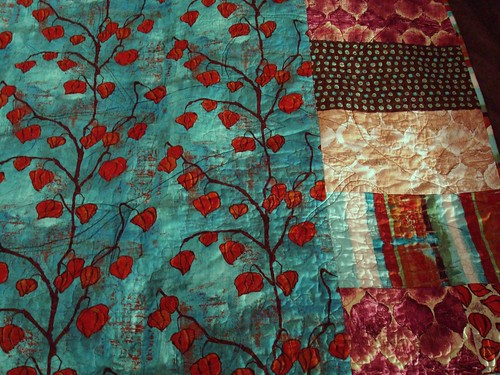
I also made the matching roll-up changing mat from the same pattern. It, too, involved some swearing and shouting about my machine being murdered, but we all emerged unscathed. The mat is one layer of cotton/bamboo blend, two layers of batting, and one layer of terry cloth, all quilted together and topstitched. You can imagine why my machine hated me for a while. But for a super-cute matchy-matchy modern diaper bag set, it's pretty great.

Sunday, December 27, 2009

Gifts for coworkers

coworker gifts 1

I work for a company of about 30 people, but my department is only 6 people and on a separate floor. I don't make gifts for everyone, but I do for my little department because I like them and because there aren't that many of them. I made all of them lined tissue cozies, and also made lined zippy bags for the two ladies. (I got some of these for the four boys).


tissue pouches 1

Once I figured out the right size to make these tissue pouches, they came together really quickly. Same with the zippy bags, although those didn't turn out as well as I'd hoped (I had some trouble with the covered ends, etc. and would've redone them if it hadn't been really late the night before the gift exchange.)

More pictures on my Flickr page, as always. Now that everyone has opened their gifts, I have a lot more catching up to do with my photo and blog posts! Stay tuned...

Thursday, December 24, 2009

Gifted: Hunter's Star Christmas quilts

Hunter's star Xmas quilts 8

I made two of these Hunter's Star quilts, one for my mom and one for my grandmother. I used white for all the star points to kind of give the effect of snowflakes. I still think that it's a little fussy to piece these, but I do like how they look. It's one of those designs that just comes across as impressive.

Hunter's star Xmas quilts 5

For the quilting, I tried some metallic silver thread. I didn't have any issues with it, just one break (and I didn't use it in the bobbin). I gave these to my mom and grandmother to open early, since they are able to be used now but not so much next week. The finished size of each quilt is around 32" square. I added hanging tabs to the backs, but thought they could also be used as table-toppers.


Hunter's star Xmas quilts 1

More pictures on my Flickr page, of course. I hope all 2 of you readers are having a very Merry Christmas! We will be opening our presents tonight, after we make some very fancy pizzas (squash, sage, and goat cheese for one).

Tuesday, December 22, 2009

Getting in the spirit...

stockings
I'm back! I really didn't mean to take such a long bloggy break, but, well, life... I finally was able to download the nearly 200 photos on my camera last night (Rob is not so good with the laptop sharing). Of course, I can't post many of them yet, but in a few days they'll ALL be post-able. It will definitely take me some time to catch up on my gift blogging.

Iris stocking 1
This is something I completed a number of weeks ago. Poor Iris had a stocking, but it wasn't very cute (pastel pink?? unlined??), so I made her this one. The fabrics are leftovers from a holiday quilting project (photos of that TK soon!) and I just traced her existing stocking and went from there.

Iris stocking embroidery
It is fully lined, and the cuff has her name embroidered. I did it really quickly, just using a simple backstitch (is that what it's called?) and some leftover metallic quilting thread, also from the secret project to be posted soon. I used two or three strands, I can't remember, and made letters about 1.5" high. She deserved something nice, for being such a fantastic kitty!

(that photo at the top makes me incredibly happy)

Wednesday, December 9, 2009

Phoebe bag

Phoebe bag front
It hasn't been all Christmas crafting for others around here. A couple of weeks ago I took an evening to make myself the Phoebe Bag after I was reminded of it by Sew, Mama, Sew a few weeks ago. The pattern is a freebie from Rebeka Lambert (Artsy-Crafty Babe) and is pretty easy to make.

Phoebe bag inside
I whipped this up in about 4 hours after work one night. I just used fabrics I had on hand that were already pre-washed, since I like to make my bags washable like my clothes (I don't pre-wash for quilting, but try to for most other things). The outer fabric is an Anna Maria Horner Drawing Room print I'd had forever, and the lining is some Kaffe Fassett shot cotton left over from this shirt. I used fusible fleece on the outer fabric but just regular interfacing on the lining. I wanted this bag to have some body on its own.

Phoebe bag strap detail
(Don't you just love that little face on the strap?) I omitted the magnetic snap (I do not like those things) and also the closure flap, though I kind of wish I hadn't. I'm a little worried about things falling out of this bag or people being able to reach in while I'm commuting. I think, overall, this bag is just a leeettle bit too small for me. Alas.... It's a good weekend bag, for when I don't need to bring my iPod and library book with me everywhere I go.

Friday, December 4, 2009

Thanksgiving weekend crafting

trimmings 1
See, now is the time of year that's really difficult for me. I'm in crafty overdrive, but I can't show you anything because everything I'm making is a gift! So I'm only allowed to give little peeks (like the one above) until everything has been received and I can reveal the gifts. It's maddening, I tell you!

trimming up
This is how I spent my Thanksgiving weekend: trimming. And trimming and trimming and trimming! And quilting, and there may have been some binding, too...

trimmings 2
Trust me, you will love what was on the other side of that cutting blade!

Thursday, December 3, 2009

STUD November received

STUD Nov rec'd front
Here it is! The STUD November "anything goes" mini-quilt that I received from Andrea (Quiltedoma). I just LOVE it! I adore 30s prints--I don't understand how anyone could NOT like them! They're so bright, and the patterns are so adorable.

STUD Nov rec'd detail
And if that weren't enough, she stitched a little heart button inside each block! Such a great touch. I asked her about the piecing, and she opted to do it without paper piecing! I cannot believe how precise it is!

STUD Nov rec'd
I also received these fabulous extras! Fabric, pincushion, and chocolates, mints, and a pin from the UN, where she works! Talk about spoiled... Thanks, Andrea!

Monday, November 23, 2009

STUD November sent

STUD Nov
I was on a roll this month and got my STUD "anything goes" mini-quilt out early, so it's already been received! Here it is in all its scrappy glory.

STUD Nov detail
I made this for Quiltedoma, who seems to share a lot of my tastes in color and fabric (and such excellent taste it is!). The quilt is based on this tutorial by Amanda Jean of Crazy Mom Quilts. I'd been wanting to make a mini like that since I first saw her quilt, and this was the perfect chance! I worked really hard to try to not have the pieces on a grid, but I can still sometimes see one. Oh well.

STUD Nov back detail
For the back I used a fantastic large-scale print to really show off all those little quilted squares. The binding is all from my scrap stash, too. You'd think I was able to make a dent in it, but you'd be wrong! It seems those pieces just multiply.

STUD Nov twin
Of course, I had to make one for myself, too. I spent a long time cleaning all the stray threads off both of these, and there are still some unraveling. I don't think this would hold up very well to regular use (unless perhaps the edges were pinked first?), but it's fine on the wall.

Friday, November 20, 2009

Tethered Threads: November

Tethered Threads November blocks
My blocks for the Tethered Threads November block party swap are done and have been received! I was on a roll last Saturday and got them both done. These are for Nicole, who is making the quilt for herself and just requested blocks that reflect our style.

Tethered Threads Nov 1
The thing is, I'm not really sure what my "style" is for patchwork, but I like doing more improvisational piecing for these block party things, so I went with that. For this first block, I really wanted to show off that awesome apple print! I also fussy cut the cat in the (off-) center of the block. It was too tempting!

Tethered Threads Nov 2
As much as I like that first block, I loooove this second one! That brown is just too fabulous here! I used it all up in this one, though. At the end I had a few more apple scraps, which I added to the bottom left side. LOVE! Again, Flickr group page is HERE to see the rest of what's being made. My month is March and I'm really getting excited!

Tuesday, November 17, 2009

Gifted: Wedding quilt

Brady quilt 4
This project has also been finished for a couple of weeks but it's taken me this long to finally blog about it. Trying to get better, I promise! This was a wedding gift for my friends, a couple I lovingly refer to as the Bradys due to their menagerie at home (animals, not kids) and their names being Cindy and Bobby. They planned a very small wedding over the summer and I only heard about it a couple of weeks before it happened, so it's not an issue that this was a belated wedding gift. They got it before Christmas, which was my plan!

Brady quilt 8
The quilt is about 54" square and made entirely out of Laura Gunn's Lantern Bloom fabrics (LOVE!) and is based off this pattern, although I made quite a few adjustments. First, I changed the background so that it was made up of 9" (finished) blocks of varying widths. I wanted to use the half yards I'd purchased more effectively, and I wanted to really show off these prints, because I think they're made to be used big.

Brady quilt 3
For the tree, I used another of those Moda Bella Solids (also LOVE!). I drew the tree on some fusible web, fused it to the brown, cut out the tree, and fused it to the quilt. I then quilted just inside the edge using brown quilting thread so that I could outline the shape and add reinforcement (my web didn't stick all that well, even with the help of a hot steam iron). After that, I fused web to a large patch of the red lanterns on cream fabric, cut out a bunch of lanterns, and placed them wherever seemed right on the tree. I like this effect better than doing the 3D lanterns the pattern calls for. I think this quilt will be used, and I think the fused lanterns make it more useable than the appliquéd ones.

Brady quilt binding
I quilted the background in an all-over scribbly curlicue stipple, avoiding the tree and lanterns, but stitching around each lantern, just inside the raw edge. I bound the entire thing in the stripe from the line. The photos were taken at night after I presented the quilt to the happy couple (after a very rushed wash-and-dry) so they aren't the greatest. This whole daylight-savings thing is throwing me off, and only lets me take halfway decent photos on the weekends, which isn't always an option! Anyway, I'm really happy with the final product, even though the photos are kinda dark. Rob was very impressed with it as well, saying he thought it was my best work to date. I'm not sure I agree, but I do think it's up there...

Brady quilt back 2
More pictures of the quilt and the pieced back on my Flickr page.

Monday, November 16, 2009

Sequined belt re-do

Belt redo 4
Remember back here when I wrote about the crafty swap I did with my friend Hilary? What I didn't mention in that post is that Hilary also dropped off a bag of fabric scraps from a handbag designer (??) that she thought I could use as well as a sequined belt that she asked me to do something with. I came up with this bag! I had it done for a good month, but because the car died, I wasn't able to give it to her until this past Friday.

Belt redo inside
The outer fabric of the bag is some kind of a denim, though it unraveled really quickly, which made it a little difficult to work with. I just top-stitched scraps of the heavier cottons (they're odd, like cotton glued to duck cloth??) on to the one side, then pieced the entire thing together. The lining is a great cotton stripe that I had on hand that I thought would match perfectly!

Belt redo 1
The handles are faux (I think) leather, and I added them in when I stitched the lining to the outside, then top-stitched the entire thing. I added the sequined belt last. It was a little tricky, and I originally planned on hand-stitching it on, but I did some quick tests and decided I could use my machine. My machine was a little unhappy, but we all got through it, and the finished project was done in less than an hour!

Wednesday, November 11, 2009

Hunter's Star quilt top

Hunter's Star top
I took a class for this in the first week in October and am just now posting pictures of it! Ugh--life. The class basically teaches you how to use Deb Tucker's "Rapid-Fire Hunter's Star" ruler. I'm a visual learner, but just looking at the ruler kind of freaked me out, so I'm glad I had the class to walk me through it. Also, it was the first class I'd taken in a looooong time (a year? more?) and it was great just to spend a day at my LQS with my quilting friends!

Hunter's Star detail
The ruler lets you make the same pattern in up to 4 different fabrics, but I wanted to keep it simple and opted for a lovely sage green repro and a white Moda Bella solid. Oh my, are those solids lovely to work with! I usually use Kona solids, but these Bellas have such a lovely hand... Anyway. I'm very impressed with my points! I'm not usually a picky stitcher--my motto tends to be "good enough for who it's for"--but even I was quite impressed with those sharp points and the way even the star center came together so easily. It was said a number of times in my class that it's a very forgiving block, and I always thought, "Yeah, right," but it really is!

Hunter's Star border star
For the border I wanted to finish the stars (tricky, but worth it) but wanted to bleed them into my border fabric, a Kona solid in a 30s green that I like to use a lot. I like the way they look kind of floating there.

This still has to be quilted, and I may add another 1" or so of the green to the border just so there's some definite distance between the stars and the binding. When finished, I think this'll hang on the wall near my sewing machine. I have plans in the works for two more smaller quilts using the same ruler/technique, so it wasn't THAT bad!

Tuesday, November 10, 2009

STUD October received

STUD Oct rec'd mini
Please don't take my delayed posting to mean my wonderful STUD swap package from Ryan was late! It arrived on October 28, which also happened to be an awful day (among other things, my car was pronounced officially dead). I received this lovely batik tree quilt...

STUD Oct pkg rec'd
...and all of these extras! Seriously, it was SO much! It really made my day. There's lotion, a notepad, buttons, floss bobbins, a magazine, a tissue cozy, and a bunch of 30s fabrics! I definitely felt spoiled, and it couldn't have come at a better time. So, thanks, Ryan, for being such a great swap partner!

Monday, November 9, 2009

Gifted: Another birthday hippo

Cynthia hippo 4
Apologies (again!) for being gone for so long. Between having to share Rob's computer at home and being swamped at work, I've definitely fallen behind in my posting of things. Not helpful is the fact that I've had gifts made but have not had a chance to give them to their recipients! But that has been remedied, so watch for a lot of posts from me in the near future.

Cynthia hippo 2
This hippo is one of those gifts that was completed and then sat in my apartment for a month before reaching its recipient. It's a birthday gift for my friend Cynthia. She's an artist, so I opted for a little more crazy combination of fabrics, but I think it's still adorable! I do love these hippos so much.

Two hippos
Here he is with my repro hippo. Aren't they cute together?

Friday, October 30, 2009

Dear Jane

DJ C9
Life...it seems to always get in the way of crafting and blogging! It's been a horrible week for me (a horrible few months actually--thanks, Saturn, can't wait to see what the next year and a half brings) with the kicker being a dead car on Wednesday (can't afford another). But things are starting to look up, even if just in small ways. Here's a block I finished on 10/9, the day before I saw the actual quilt in person. I followed the photo of Jane's block and pieced the square from four triangles before appliquéing on the teardrop shapes. I also cut out the fabric behind the teardrops when I finished--I usually leave the background in my appliqués, but this was showing through and I wanted to get rid of it. I was very careful about it, but I could certainly use a small pair of appliqué scissors for Christmas (Mom? Are you reading?)

Hope everyone has a happy Halloween! I know it'll be an insane weekend in Witch City, where I live.

Friday, October 23, 2009

Tethered Threads: October

Tethered Threads Oct 2
Not sure if I've really talked about this here yet, but I joined a block party called Tethered Threads. Our first month was October, and we had to make two 12.5" blocks for mommymae. She is making a quilt for her daughter and had requested modern piecing, along with a little bit of something different, like appliqué or embroidery.

Tethered Threads Oct 1
I like the first block better, but I guess I'm pleased with how both of these turned out. The recipient is, so that's great! For both blocks I did some improvisational piecing (stitch, press, trim, stitch, press, trim...) and I added a bit of fabrics from my stash to fill them out. I was happy to see those Anna Maria Horner prints, as I still have bits of those Garden Party fabrics in my scrap pile. For the block above, I didn't want to chop up that lovely print in the middle, so I appliquéd those Good Folks circle flowers to add a little more interest to the block.

You can see the group's Flickr page HERE. I'm excited to see what everyone in the group can do! My month is March and I'm spending a LOT of time thinking about what to request... And what fabrics to buy!

Thursday, October 22, 2009

STUD October sent

STUD sent Oct 2009

I heard from my partner Ryan today that the STUD "anything goes" mini-quilt I sent him has been received, so here it is! I used a new (to me) quilt-as-you-go technique from Patchwork Style to piece this one and the twin for me directly to the batting. Then I backed it, and did a squared spiral stitch-in-the-ditch to hold it all together.

STUD Oct twin

Both of these quilts were made entirely from scraps in my stash! That definitely felt good, though I don't think I even made a dent. These came together really easily and quickly. I cut the pieces a lot smaller for Ryan's quilt (I made mine first as a test-drive) so that it would take longer and be more complicated. I have plans to use this technique again soon!

Wednesday, October 21, 2009

Finished: 2 Yellow Brick Roads

2 YBRs 2
These have actually been finished for weeks now, but my gramma just got hers yesterday (hand-delivered by my mom), so I'd been waiting to post until we each had one! These are the quilts I've blogged about before here and here.

2 YBRs 3
I am quite pleased with how they turned out. And I think it's so interesting that they look so different, since the centers are the same. My quilt is bordered in the blue and bound in the light green, and my gramma's is the reverse. We also chose different backings. Still, I really like that they're the same but different.

Iris and me YBR 2
I took these photos a couple of weeks ago, when my parents were visiting and I still had both quilts in my possession. My dad was helping me hold them both up, and then this photo of Iris and me happened while he was holding my quilt in the background. I love it. She's sniffing my nose. She always makes me melt when she does that--it was the first thing she did when we opened her cage to meet her at the shelter: sniff and then rub my nose. How can you not love it?!?