Monday, June 27, 2011

apARTment art show recap

shelf of awesome
Hello, blog. Long time no...anything, actually. So sorry about that. I was so busy getting ready for the apARTment art show held on 6/17-19, and then took a *really* long time to recover. Ahh, 30. I sure don't bounce back like I did in my 20s! Seriously. It took me a good week to feel "normal" after working and crafting so much. Still, the show (where we turned my friend Hilary's apartment into an art gallery and sold the work of 15 people out of it for an entire weekend) was a success, though I had hoped for more sales. But isn't that the way it goes with craft shows? You always hope to do better than you actually do? Or is that just me?

apron and bags
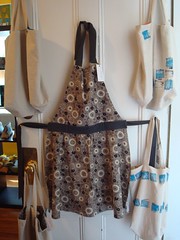
So, here's my quick recap post. What you see in the top photo is the amazing display we came up with using Hilary's IKEA bookshelf, sans books. It was awesome. Directly above is part of my display, featuring one of my aprons and four linen-blend tote bags I cooked up. These were hand-printed by me in what was my first but surely won't be my last attempt at printing on fabric. They're fully lined with cotton and the perfect size. Nobody even looked at them *sigh*.

minis in frames on wall
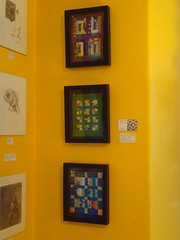
In an effort to make my art a bit more affordable, I crafted some hand-quilted teeny tiny quilts in shadow boxes. I was hoping to make them more affordable, but they actually took a ridiculous amount of time, so I had to price them a bit higher than planned. Nobody even looked at them, either *double sigh*.

apron and frames
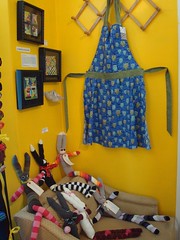
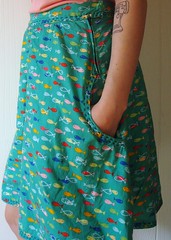
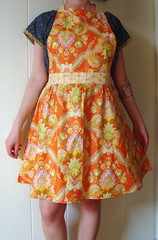
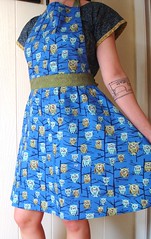
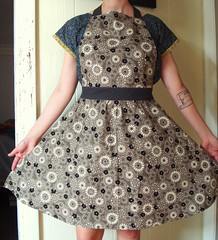
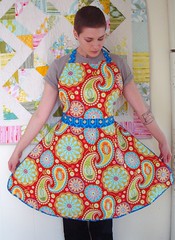
Here's a photo of more of my setup, including another set of three quilts in frames. I ended up wearing that apron around most of the weekend, since they look so much cuter on a person than on the wall.

zippered pouches open
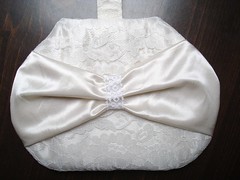
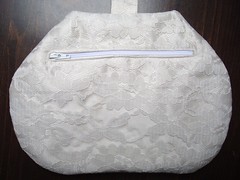
I also made these linen / cotton zippered pouches with covered ends and more hand printing. I sold 2 of them, which made me happy. I think they're really nice, and surprisingly big. Still, they didn't get the attention I had hoped for.

2 hippos
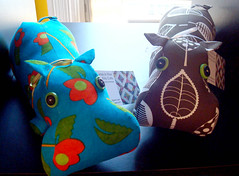
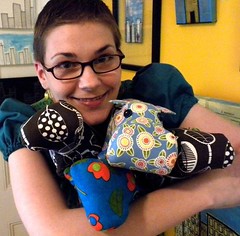
What did get the attention were my hippos. These represent my first original softie design, which I would call surprisingly successful! I went through 3 rounds of muslins before I reached my final master pattern, but that's not bad considering I started with my own sketch (and I am NOT a good drawer). I relied on Abby Glassenberg's soft toy design series for help on drafting the gussets and adding darts, but this pattern is wholly original and wholly mine!

me with hippos
I see more of these in my future, as I've already received a personal invitation to apply to a local holiday craft fair. I may also consider developing the pattern for sale on its own, but am very wary of copyright infringement so am a little afraid to put myself out there like that. In the meantime, I am working on my second softie pattern, since I love these so much! And almost all of them sold!

Side note #1: I now wear glasses (see above). Boo.

Side note #2: In all of my hippo stuffing, I exhausted my ginormous supply of Morning Glory super premium fiberfill, so I ordered some more. It is crazy hard to get, so I ordered two 5# boxes from Amazon. I opened them up on Friday night and was horrified to realize that they've changed the formula. Instead of being a fluffy white cloud of amazing stuffing, it's now a dingy, pill-y mess of shedding fibers that migrate through my fabric (I like to stuff firmly). It's even worse than cheap Poly-fil, which is saying something! So, crafters, I beg of you: What do you use for fiberfill? Where do you get it from? I've already ordered a couple of different kinds online that I will try until I find one I really like. I need something that will allow me to stuff firmly without migrating through my fabrics, which are usually quilting-weight cottons. It can't be too poke-y, and it can't be too slippery that it won't stay where I pack it, like in the legs or other curvy, small places. Any suggestions would be greatly appreciated! I am loving making softies, but now having a minor freak-out about sourcing materials. At least I have until November before my next show...

Thursday, June 9, 2011

Clothes for me!

giraffe bubble skirt 2
In between making stock for my upcoming show/sale and sewing for birthday and other gifts, I took some time to craft a few more wardrobe essentials for myself. Like the giraffe bubble skirt you see above. Essential, right?!?

giraffe bubble skirt 1
I can't fully explain how much I adore this skirt. It is so. much. awesome. in such a small package. The giraffes! The hem! The overall foofiness of the shape! LOVE.

giraffe bubble skirt hem
Okay, the details: The outer skirt is cut using my go-to self-drafted full skirt pattern (side note: I just realized that I mentioned the giraffe bubble skirt in that post! It only took me a year to get around to actually making it...). The lining is cut using my self-drafted A-line skirt pattern (all of which I learned from Cal Patch's book, which I can't recommend enough!). The assembly was kind of done on the fly. I'm starting to realize that I'm understanding garment construction much better these days, and it a really fantastic, I-just-know-what-to-do-and-don't-have-to-really-think-about-it kinda way. So when I knew I wanted to make a bubble skirt, I made my A-line, chopped about 4" off the hem, attached the gathered outer hem, and then attached the layers at the waistband. I added little snaps to hold the overlapping waistband in place, and hand-stitched the lining to the invisible zip (I'm starting to figure those out too--yay!) on the inside. The lining is leftover from my birthday dress and is really lightweight (I think cotton lawn), so even though the outer fabric is quilting-weight cotton, the skirt is not too heavy.

flora skirt 1
I also made this flora skirt using the A-line pattern I drafted from the Cal Patch book. I drafted the pattern a year ago and only just now put together a skirt from it, and it's actually a little big. I need to make another muslin and possibly re-draft the waist a bit. (I don't think this means I've lost weight, though, maybe just that it was really hot when I made my first muslin?) I put the pockets too close to the center / too far away from the hip seam, but I think this skirt is fine for a first try. I'm definitely wearing it!

fish skirt 2
Last is not a new skirt but a bit of an update. I originally blogged this fishy skirt here, but only just got around to adding the contrast stitching. Now that I look at the before and after pictures, I'm really glad I did it--I think it adds a lot. Plus it only took me like 2 episodes of Law & Order on a Saturday morning to do it all.

Wednesday, June 8, 2011

Apron, take 2

skirty apron vintage 3
As I mentioned in my last post, here is the tweaked/revised apron pattern. I think I solved all of the minor issues of the first apron with this batch, so I believe this pattern is a keeper!

skirty apron owl 2
Revisions are to the skirt, which now has a double-hem all the way around instead of that horrible bias bind I struggled with on the prototype, and to the bodice. Instead of being a straight geometric shape, the bodice is now a bit narrower on the bottom, quite a bit narrower at the top, and I used my hip curve to cut the sides with a bit of a curve to them, which I think makes them look a lot nicer.

skirty apron bw 1
And, a bit of news: these three aprons will be for sale at the apARTment art show I'm participating in next weekend! We're mentioned in this little local write-up; if you're in the Boston / North Shore area, please come check it out! More of my stock to be revealed shortly!

Monday, June 6, 2011

More gifted crafts

CK purse 1
Poor, neglected blog! I am so so bad at keeping this updated... Here's a quick catch-up of gifts I've recently presented to friends. First up is a bridal shower gift: a vintage-inspired handbag. This is for my friend Chrissy, whose wedding dress I made! (!!!) More on that in a month or so, after the wedding--I can't ruin the surprise! But you can consider this your sneak peek, as I used the same fabrics from the dress to make this sweet little bag.

CK purse back
The pattern comes from Making Vintage Bags, appropriately enough, except instead of copying and enlarging the pattern, I made some quick measurements and drafted it myself on some printer paper. Easy peasy. Other than that, though, I followed instructions as written and, in the process, learned a nifty new way to set in a zipper, which you can see above!

bday bookshelf quilts
I made these bookshelf mini-quilts for two friends who had May birthdays. The design is from Modern Quilt Workshop and is pretty easy and fun to do. Once again, I machine-applied the binding, which really sped up the process. This is beginning to become my go-to method...

skirty apron 1
Last is this Mexi-themed apron I made for my friend Vanessa as an additional birthday gift (hey, she threw my birthday party in April, so it was the least I could do to try to pay her back!). This apron pattern was completely drafted by me, which makes me ridiculously happy. The skirt is modified from this one I drafted for myself, and the top is a pretty simple geometrical shape that I forgot the name of as soon as I finished 8th grade geometry. The skirt corners are rounded, and the whole skirt is bound in my first (and possibly last) attempt at continuous bias tape. Seriously, it was BAD! I liked the final outcome of this apron, but there are a few things I tweaked for my next round, which I will be showing you soon!