Wednesday, August 31, 2011

I made a wedding dress.

CK garden 3
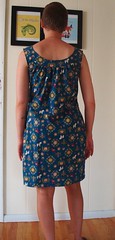
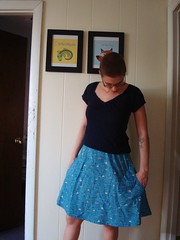
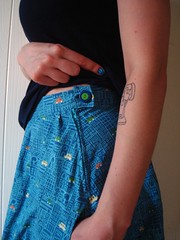
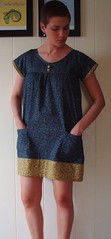
All photos in this post (c) Lisa Rigby Photography (doesn't she do fantastic work?!)

Let me say it again: I. Made. A. Wedding. Dress! This is the first time I'm posting about it (beyond here, where I alluded to starting this project, and here, where I blogged the bag) but it's been done for a few months now, since the wedding was in the end of June!

CK in dress
What happened was this: an acquaintance who is a friend of a friend contacted me about helping her hand bind her wedding invitation books, since I've done my share of bookbinding (little-known fact!) At the end of our dinner of brainstorming and beers, she asked if I'd ever made a dress on commission. By that point I had a buzz going and was feeling super amenable, so even though I was hesitant, I heard her out. She had a very small budget and just couldn't find anything in her price range. What Chrissy wanted sounded simple enough: a strapless, A-line dress. I can manage that! With a full-on lace overlay. Ooh, maybe not so much...

CK garden 1
But I agreed to look into it. The next day I did some research into fabrics and patterns, and decided that if she was okay with the inexpensive lace, plus if she would hang out at my place while I made it, it would be a project I was willing to take on. We ordered fabric swatches and a pattern (which I can't find online anymore??), and I got to work.

CK garden 2
The pattern had two skirt options: a floor-length sheath with a slit, or a tea-length A-line skirt. I ended up grading the top and bottom, since Chrissy's measurements varied a little, and then re-drafting the bottom to be floor-length but the same circumference as the tea-length A-line. Did you get all that? I then went through 3 rounds of muslin for the bodice, which was tricky, of course.

CK dad dance
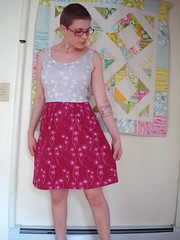
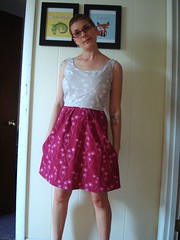
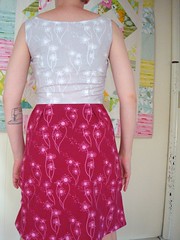
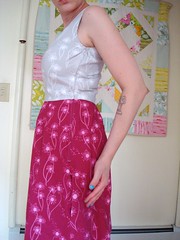
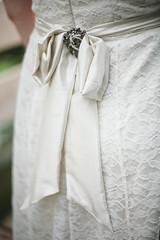
I wanted the lace overlay to be separate on top of the skirt, so I used French seams to hide the raw edges. I also cut the pieces as best I could to preserve the scallop that was the selvage. You can see a pretty good shot of it above. (Yeah, I'm doing a little back-patting right now!) But I layered the lace on top of the cotton-silk blend for the bodice because I knew fewer seams and bulk was better. Hence the sash at the waist, which covered up that transition.

CK dress back
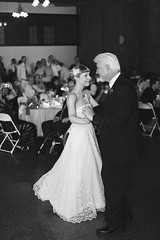
In all, I'm super pleased with the outcome, and so was Chrissy! Rob and I were invited to the wedding but didn't go, partly due to logistics, and partly to the fact that I was too anxious to be in the same room as that dress on that day! Everything went off without a hitch, though, and you can read more about it and see more pictures here and here.

CK garden 4
Even though the results of this collaboration were excellent, I'd be extremely hesitant to do it again. Chrissy is super cool and laid-back, so was pretty easy to please, as long as the dress fit and was comfortable! I'm not sure other brides would be so easy to work with. Chrissy's budget was a set amount, which included all materials, and whatever was left over went to me. I over ordered on the fabrics in case I had to remake any parts, and I tracked all the time I spent, from re-drafting to ironing to sewing and fitting. In all, I ended up earning less than $10/hour. Definitely not a living wage, so don't expect this to become a new side business for me! But I gained a TON of experience, satisfactorily worked through some crafty challenges (which is probably what drives me the most; that was fun!), and got to be even closer friends with a super cool chick. What's not to love?

CK Tim 2
A success indeed. (A few more photos here.)

Thursday, August 11, 2011

More Dear Jane progress

DJ C2
It seems I am now making these blocks faster than I can blog them! I looked at my finished blocks for the summer and noted that I only finished 1 in June, but got nearly caught up with 7 in July! I am happy to say that I'm finally back on track with my one block per week completion schedule! Which means that I have three blocks that are still on my camera, with another in progress. It seems I'll always be behind with documenting, if not making.

Anyway, above is block C2. I'm finding these diamonds a little tricky to appliqué, even using the back-basting technique. The corners just always end up a little bulky.

DJ C4
Here's block C4. That sashing in the middle adds a LOT of pieces! It finishes at around 1/4", so it's a little tricky to stitch, too.

DJ C5
Block C5 is possibly my favorite so far! I really like the sweetness of it, and the fabric I used. I traced the block onto paper first before reversing the design and transferring to freezer paper, so my block "spins" in the right direction! I also redrafted slightly to match Jane's quilt, piecing the white curves to white wedges. I really like the look it gives the block.

DJ C6
And here's block C6, one with all curved piecing. I really am finding this simple to do by hand. For these last two blocks, I didn't even have to clip any of the curves to make them fit. I think I'd prefer to do curved piecing over curved appliqué, if given the choice. I really love the fabric for this one, too.

You may notice on the sidebar that I've changed the way I'm tracking my finished blocks. This chart is actually Excel-based and requires much less Photoshop work on my part. It doesn't look as pretty as the old one, but I think it's easier to see my blocks without Jane's quilt in the background, so there you go. I'm really looking forward to having rows A-G done so that the trip around the world pattern becomes more obvious, because right now it's not really evident.

Monday, August 8, 2011

Passport Dress

Passport dress 2
Since my last post, this happened (check out the comments--eeee!) and there has been a lot of behind-the-scenes Dear Jane-ing which I plan to show soon, but not much else by the way of productivity. Which is okay, because I'm plugging away at some fall deadlines, including two commission projects, while still dreaming of doing more sewing for me. Above is my take #1 of the Lisette Passport Dress.

Passport dress 1
I pretty much followed the pattern as written for this. I did add my Socialite Dress pockets to the side seams of this skirt, but they are a bit too low as I started them below the pattern's zipper marking. Oops. Still, they're there. I also did a bias bind instead of a facing around the neckline, but I think the neckline is a bit puckered and really could've used a facing, even with my stay-stitching. Again, oops.

Passport dress back
I'm not really sure how I feel about this dress. I did a bit of modification to the bodice, taking out some length but preserving the neckline and strap length. It's fitted, but not tight, though the back puckers horizontally (if you can see that above), which makes me feel not-so-confident about it.

Passport dress zip
Also, once I put the dress together, it was gaping at the armpits. Because I didn't notice this until I'd already put in the lapped zipper (which I think I did pretty well! yay!) and finished the arm holes, I added a little pleat to each side. It's not so noticeable from the front, but it still bugs me. So, I guess if I ever DO make this dress again, the bodice will require at least another go. *sigh*

Monday, August 1, 2011

Sewing through...

Folklore Socialite 1
I may have mentioned this before, but I'm completely overwhelmed by all the fabric in my sewing room, so I've been trying to sew through what I have set aside for garment-making. It's a quick and easy way to decimate yardage, which is a big plus. Getting cute, tailored clothes is another plus. What you see above is my first crack at Anna Maria Horner's Socialite Dress pattern, out of Lecien My Folklore fabric purchased from my local quilt shop.

My Folklore Socialite back
For the most part, I really like this dress. There are no closures, so it comes together easily and just slips on. There are great pockets at just the right place, so that's a HUGE bonus. I'm iffy about the back, though, and looking for some suggestions. I know I could belt this, and I have enough fabric left over to make one, but in general I don't much like that look, and I don't really want to draw attention to my midsection. However, the back has all that gathering, but isn't really roomy below the waist (ahem), so I feel like there's an extra pouf of fabric at the back. It feels odd. When I wore it to work one of my coworkers said it was fine, but I'm still not sure... I really love the front. Have you made this dress? What do you do? I'm considering making another muslin and removing the gathered fabric from the back.

city skirt 1
Here's a fun skirt I made using a Michael Miller (?) print, also from my LQS. This is the same skirt I've made three times already, but when I love something, I do it over and over. My favorite part about this skirt is the button:

city skirt button
Yeah, I know nobody will see it, but it's awesome. And it makes me happy.

big button dress 2
But lest you think it's all success around here (ha!), here is a borderline craft fail I made months ago but am only finally getting the nerve to post. I used this easy tutorial and some more fabric from my LQS that had been sitting around forever, but I don't think I like it. I'm not sure exactly what it is: The fit is fine, the sleeves are cute, the covered buttons are sweet, and there are pockets! But it just isn't working for me.

big button dress 3
I think it looks borderline nightgown, in a weird way. What do you think? I wonder if it has to do with the dark fabric being the main and the light fabric being the accent. If I had switched them, would it be better? Or if it were made of all one fabric? Or does this dress just say "fall" and need dark tights and knee-high boots underneath? Suggestions? I'm afraid this will just be relegated to my closet... maybe I can turn it into a top?