Friday, December 3, 2010

With the Band vintage skirt refashion

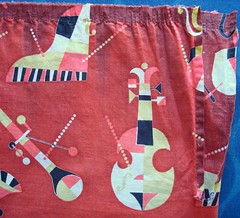
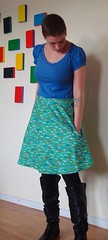
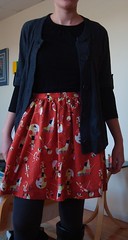
with the band skirt after 1
This skirt has quite the story... I saw it in the window of Modern Millie, the amazing vintage / consignment shop in town, and couldn't stop thinking about it. I stopped by the shop a few days later and it was still there! I knew I had to have it.
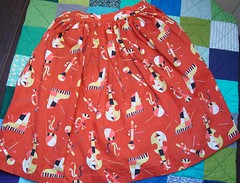
with the band skirt before 1
Except... there were problems. The salesgirl warned me, as she was taking it off the mannequin, that the waist was small. Really small. Like, 18" of small. So small, in fact, that she couldn't take it off the mannequin's hips and had to fight to get it off over her shoulders. Ummm... a problem, for sure, but how fantastic is that print?!? "It needs some love," the salesgirl said, and I knew I was the one to give it, so I bought it.
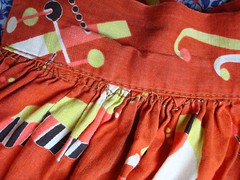
with the band skirt before 3
When I got it home, I did some investigation, and here's what I've figured out:
  • This skirt is homemade (see gathering stitches showing under the waistband)
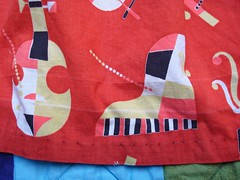
with the band skirt before hem
  • This skirt was probably for a child (see tiny waist, and hem that was let down twice)
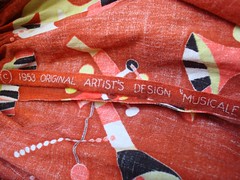
with the band skirt selvage 2
  • This skirt is old: selvage was still attached, and the fabric design is copyright 1953!

Thankfully, the skirt was also long enough that I could make the necessary alterations. Here's what I did:
  • Used my seam-ripper to remove the existing waistband
  • Carefully un-gathered skirt
with the band skirt ungathered
  • Pressed the heck out of it (check out the fading!)
  • Cut 3" off the top of the skirt
  • Cut a slit down the center back to remove the hole and insert a zipper
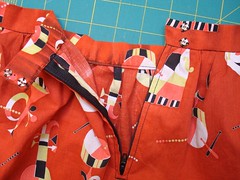
with the band skirt after zip
  • Sewed a seam in the center back and inserted a zipper
  • Re-gathered the skirt to fit my waist
  • Fashioned a 1" waistband from the 3" I cut off the top
  • Attached waistband to re-gathered skirt and added a snap closure
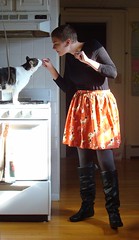
with the band skirt after 4
And here is the finished skirt! It really wasn't that much work to fix it, and the new length hits a few inches above my knees, which is perfect! Also, because the skirt is made of two lengths of fabric sewn selvage to selvage (there are two sets of selvages--one at each side seam), there's still a lot of volume. And that print! Oh my--I am in love!

Wednesday, December 1, 2010

Commission crafting

JJ scotty dog 2
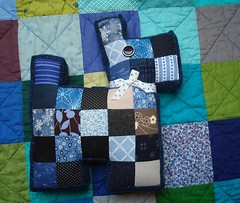
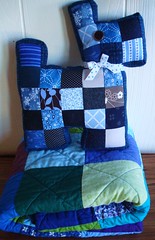
Well, I'd been hoping to get this post up in November, but... The holidays are here! That means 'tis the season to craft like a maniac but not be able to reveal what's been crafted! So, maybe it *is* a good thing that I'm behind on blogging my projects... These were all made for friends by their requests. Above are a mini lap quilt (about 31" x 40" finished) and a Scottie dog made for my friend JJ's parents. The lap quilt was just pieced from pre-cut squares from Connecting Threads. It's put together the "cheater" way, with no binding. There is a layer of batting and the backing is a cozy flannel.

JJ scotty dog 3
The Scottie dog is another attempt at this pattern. I really like how stately this guy looks with his little neck bow!

Sandy apron 2
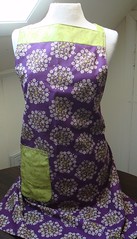
This apron was a request by another friend and is an improvised pattern from me. I now wish I'd made it a little smaller in the bib top and in the drop to the hips/ties, but it's an apron, right?!? Too big is okay, and I realize I'm on the petite size of average (read: shorty) so just because I had to gather it up at the tie doesn't mean everyone will have to!

Back to my elf-cave of holiday crafting, but more soon!

Wednesday, November 24, 2010

Fishy skirt

fish skirt 3

Here's another go at the skirt pattern I drafted over the summer. This skirt is almost exactly the same as the original (which is one of my favorite skirts to wear!); I used a pants clasp closure instead of a button on the waistband, but that's the only difference. I want to (again) plug Cal Patch's book, which is awesome and you should definitely own if you're interested in pattern drafting, or even just in making your own clothes that fit right the first time.

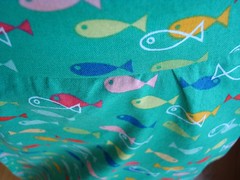
fish skirt fabric detail

I really loved this fishy fabric when I first saw it (in January or February, I think) and bought a few yards to make a full skirt, so this is me finally getting around to it! I still want to do some hand-stitching with a thicker thread around the pockets and maybe the hem; pictures TK, if I actually get to it!

As a side note, I'd like to wish you a very happy Thanksgiving if you're reading this! It'll be all sides and Quorn Turk'y Roast for us this year, as it has been for many previous years. Thanksgiving tastes SO much better when it's cruelty-free!

Monday, November 15, 2010

Comfiest dress ever

Love flannel dress 3
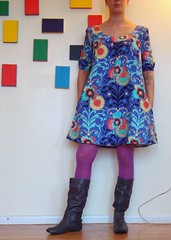
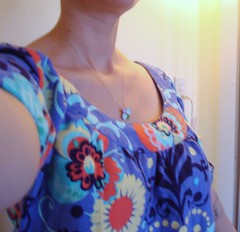
Seriously. I am in love with this dress, and I've only been able to wear it twice. So far. It's currently in the wash, which I need to do so I can wear it again this week! It really is so comfy, cozy, and really really awesome--might I say my best apparel-sewing to date?

Love flannel dress 1
This is take 2 of my Kathy dress pattern from Cal Patch's amazing Design-It-Yourself Clothes: Patternmaking Simplified and I like it even more than take 1, which is saying something! The first thing I did before making this dress was re-draft the shoulder / armhole area. I ended up narrowing the shoulder significantly so that now it fits really well and isn't sagging or baggy. I also re-drafted the armhole to be less deep. The seam here is still a little wonky and could use some more work, but it's a definite improvement!

Love flannel dress back 1
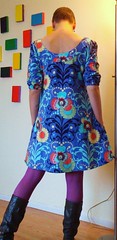
Here's the back. I meant for the sleeves to go to a few inches below the elbow with the elastic in the cuff, but once I hemmed them and made the casing, they came out a little too short, so I need to wear them above the elbow (which is fine--hello, tattoo!) This time I cut the pockets into the correct side of the dress, too!

Love flannel dress neckline
The fabric is flannel, from Amy Butler's Love line, and it's the most gorgeous shade of periwinkle; I just love it. The dress has the potential to be really warm, so this deep scoop neck in the front and back is really essential.

Saturday, November 13, 2010

Housewarming / engagement gifts

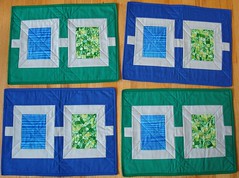
4 placemats 1

A bit of news: I'm getting a sister! Well, a sister-in-law, but still! I only have one brother, so I'm very excited that he is getting married! I was in Cincinnati a few weeks ago, visiting with the newly engaged couple--who had also just moved in together--and I wanted to bring them a little handmade as a congrats. The first things I made were these placemats from Dare to Be Square Quilting. (An aside - this book is really really cool and I'm surprised I haven't seen it out in blogland more!)


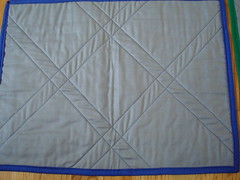
4 placemats back detail

The patchwork is simple, and the quilting is perfect--I did mine in a dark blue cotton thread that added just the right bit of contrast. And it looked cool on the back, too! This was my first attempt at this method of machine binding, and I must say that it turned out pretty well and definitely saved me a lot of time hand-stitching, though did take a bit of time at the ironing board making the non-bias binding tape.


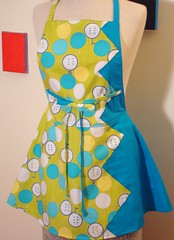
zigzag apron

The next thing I made was another zigzag apron, from Stitch magazine a couple of years ago. I forget that this is kind of a fussy pattern, with a lot of pieces, and facings, and interfacing, and miles and miles of handmade bias tape... Still, I'm so pleased with the finished product that it's worth it.


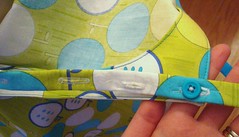
zigzag apron button band

I made this one adjustable at the neck with a button closure, just in case my brother wants to wear it. Of course, he put it on right away and it's WAY too small for him, but I must admit that the skirty bottom sure looked cute!

Thursday, November 11, 2010

Misc crafting

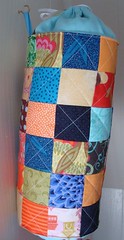
plastic bag dispenser

More catch-up! Here are some little bits I stitched up last month. The first is a plastic bag dispenser, which we didn't know we needed! The pattern is from Stitch magazine a few issues back, and the bag holder hangs on the wall near the litter box. Genius! There's something about those patchwork squares with the diagonal-line quilting through them that just warms my heart...

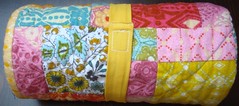
quilt with wrap 2

The second bit is a little of an after thought. I'd been meaning to make these removable bands to secure baby quilts for the show that killed my mojo but ran out of time. Now: done! It's a very simple little design, but one that I hope is helpful for parents trying to juggle a million and one baby supplies.


And, sort of related, this lovely post from my reader yesterday goes a long way in summing up how I feel about sewing. Thank you, Mom, Thank you, Gramma, for teaching me to sew. I love you.

Tuesday, November 2, 2010

Gifted: Birthday

Sadie bday gifts
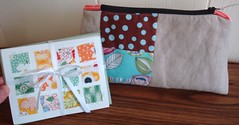
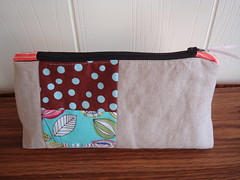
How is it November already?! I feel like I'm so behind in blogging my fall crafting, and now it's time to start kicking things in gear for Christmas crafting... Oh my! Pictured above is the birthday present I sent to my friend Sadie about a month ago. I wasn't sure what to make for her, but I've been thinking for a while about coming up with my own zippered bag pattern, which is what you see above. I also included a set of my cards, left over from the craft show fail from September.

zippered pouch 1
I think the pouch pattern still needs a little bit of work, but in all I'm pleased with how it came together. I like the look of linen + patchwork, and I also like the durability it offers, too. I also really like covered ends on zippers. It's a little thing, to be sure, but makes quite a bit of difference--and also stretches those 7" standard zippers just a little bit further, which I like. The ribbon on the zipper pull is just the finishing touch!